Muzzle loading target shooters Forums
  http://prwarner.wix.com/mlts-masters Email mlts.masters@gmail.com
![]() Offline
Offline
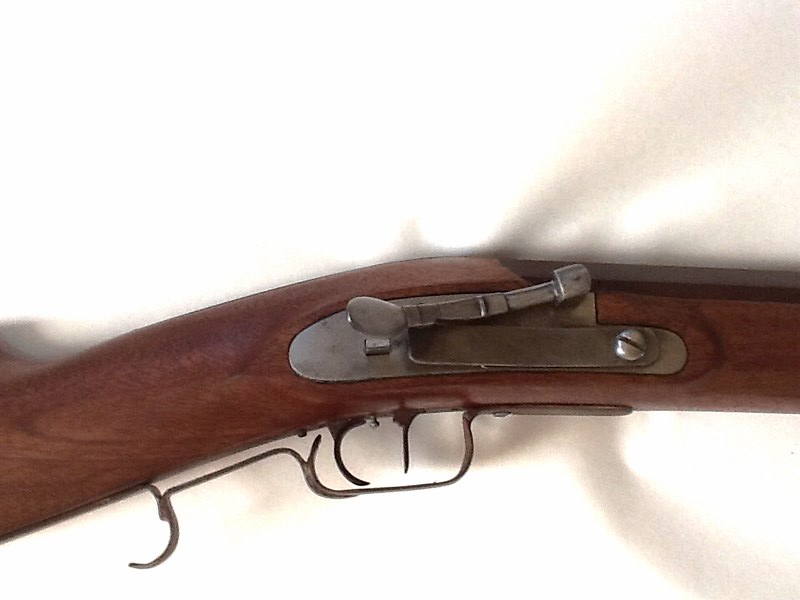
Thought I'd move my chunk gun build here. Have roughed out the butt plate and trigger guard. Have the barrel inlet
and pinned. Made and installed the breech plug. Inlet the lock and triggers, and installed the nipple.
next up, inlet the butt plate.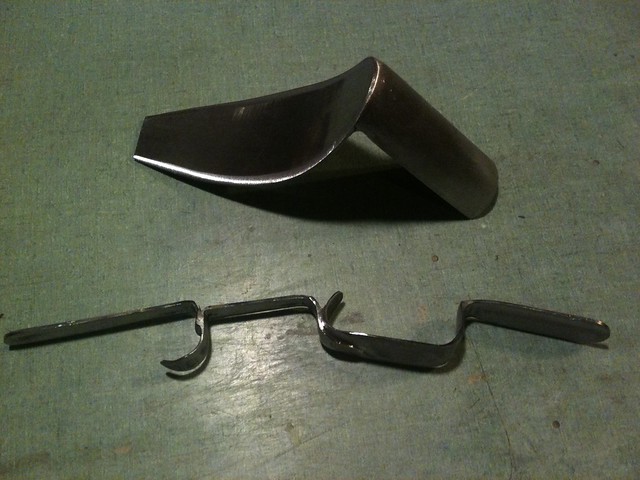 photo (15) by okawbow, on Flickr
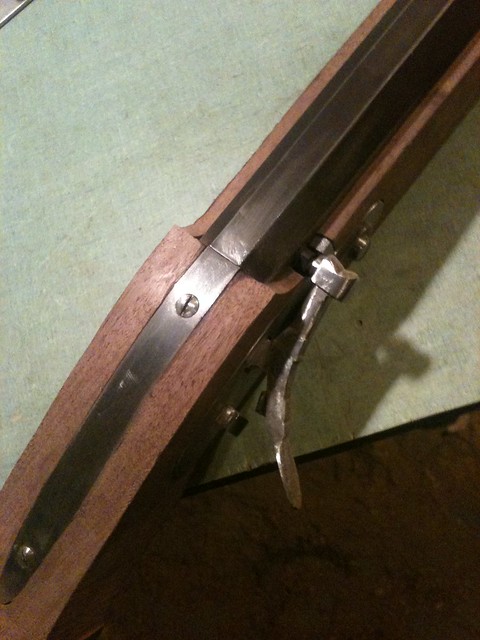 photo (12) by okawbow, on Flickr
 photo (14) by okawbow, on Flickr
![]() Offline
Offline
More about that lock?
![]() Offline
Offline
I am making the lock based on pictures of Samuel Morrison rifles. All his locks seem to be different and hand made. All of the works are on the outside of the plate, except the frizzen spring.
I still need to polish and case harden the parts.
I popped a dozen or so caps with the lock. It seems to be fast and reliable.
![]() Offline
Offline
looks great .something to think about is bending the curve at rear of trigger guard the opposite way.that way your it wraps around your fingers and you can pull the gun into shoulder real tight nice and easy. quite a few of the top shooter's did this .like the way your triggedr guard is going to close fit to the sctock
dag
Last edited by dag (12/21/2015 11:40 PM)
![]() Offline
Offline
Liking your build a lot! Perhaps I missed the barrel specifics: maker, caliber, length and width across flats?
![]() Offline
Offline
Thanks Dag.
James, the barrel is a used Ed Rayl 48 cal. 1 1/4" straight, 54" long. Twist is about 1 in 60".
Installed the butt plate and trigger guard over the weekend. Roughed the stock down a little. I can start shaping the stock next, but I'll make a set of sights first. I plan to get 90% finished and shoot the gun enough to get an idea of the best position for the built in cant block.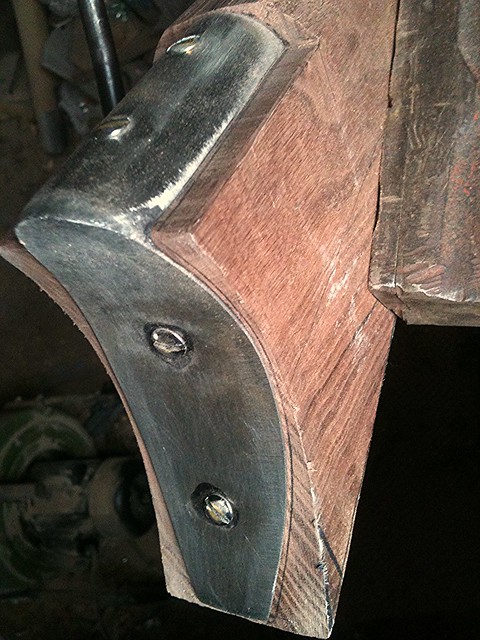 photo (16) by okawbow, on Flickr
 photo (13) by okawbow, on Flickr
Last edited by Okawbow (12/22/2015 12:17 PM)
![]() Offline
Offline
buy a set of premade paul Griffith style with ball front sight from robin warner. that is the hot set up over 75% of chunk shooters u8se them and almost all the top shooter . love your lock. leave losts of wood on top of comb till you get your sights on and shoot it. no fun after gun is finished realizing to combs to short. you did great going with nice wide gentle curved butt plate.
dag.
![]() Offline
Offline
Would you have a website or email for Mr. Robin Warner?
thanks,
Last edited by crankshaft (12/27/2015 12:03 PM)
![]() Offline
Offline
p.r.warner@hotmail.com
![]() Offline
Offline
For the benefit of all...
Can someone post a picture of the "Ball front sight"..???
Thanks.
![]() Offline
Offline
Don,
Can't post but the sight is nothing more than a post with a bead on top. If no one posts later, I'll forward a pic to you this evening.
Mark
![]() Offline
Offline

like Mark said email address p.r.warner@hotmail.com or private message me. I'll see if I can get a good enough picture of a pin head sight to post.
![]() Offline
Offline
Thanks guys. I believe I understand what is being referred to.
I have a set of inserts for a front sight which includes one that sounds a lot like what you're describing.
I looked up "Globe Front Sight"...couldn't post a picture here.
Is this sort of front sight setup permitted..????
Thanks.
Last edited by Don Steele (12/29/2015 5:46 AM)
![]() Offline
Offline
Don,
Yes. A typical front sight on a table or chunk gun Is a "globe" sight with a post and bead insert. Besides the Griffin front sight, Lyman makes a modified post and bead for their hooded front. I think it is a #17 sight. This is considered the same as using a standard front sight with a shader.
Mark
![]() Offline
Offline
If you want to see what Pauls rear sight looks like go to over the log page 3 and look for diamond sight go down
through the post and you will find a picture of Pauls sight.
Dick
![]() Offline
Offline
Got it.
Thank you...I'll be looking at Table and Chunk guns at Friendship in June to see if anyone uses that Diamond sight setup.
Very interesting.
![]() Offline
Offline
Don,
Paul, and now Robin, also made a tall sight with a round bottomed straight notch. Both work well with the post and bead front,depends on what you like.
Mark
![]() Offline
Offline
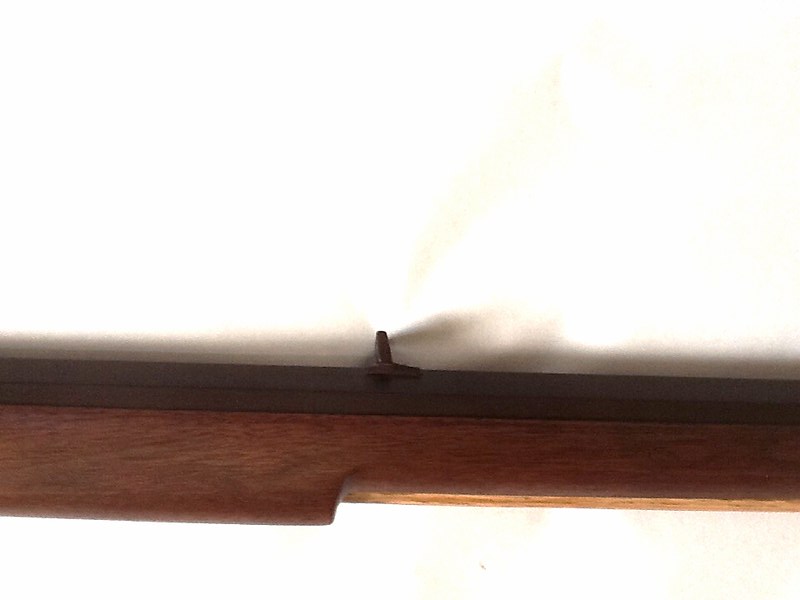
I got to work on the rifle a little in the past few days. Roughed out the butt stock and lock panels.
I'm making a fore end cap next, then ramrod pipes, and toe plate.
I plan to take the gun to the range this weekend and shoot it enough to work out the comb, cheek piece and cant block. I can only find .480 balls, and the bore is .482. I'll see how that works.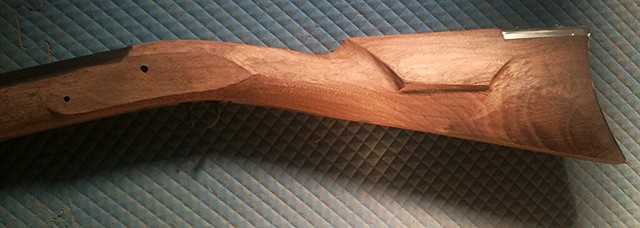 photo (18) by okawbow, on Flickr
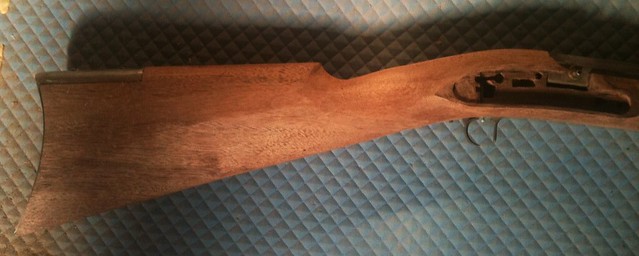 photo (17) by okawbow, on Flickr
photo (17) by okawbow, on Flickr
Last edited by Okawbow (1/01/2016 1:12 PM)
![]() Offline
Offline
Moving right along and looking positively svelte. Have to get out the panoramic lens to take a picture of the whole thing with the big and long barrel. Have you decided on the design of the forend rest yet?
![]() Offline
Offline
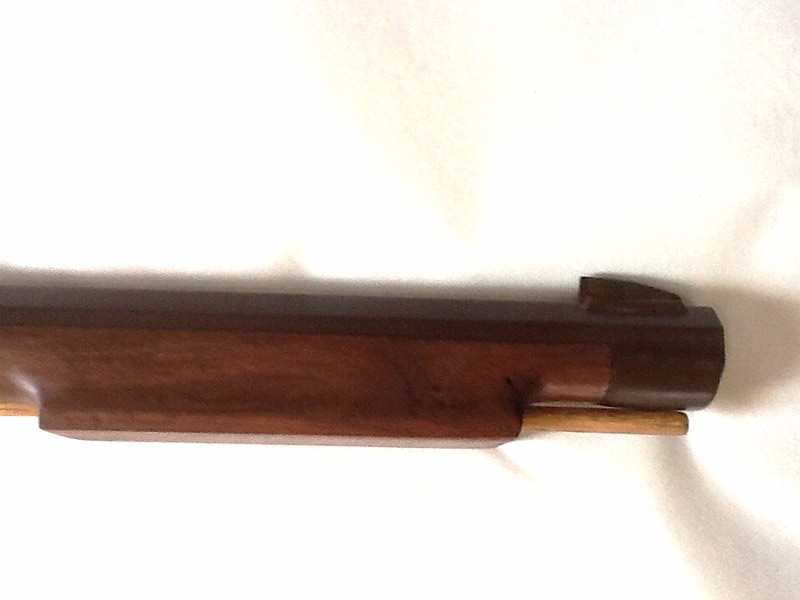
James, I left the forearm wide for about 12", so I can have a built-in rest. As soon as I find the sweet spot; I'll trim it down to about 4" length.
I made the nose cap this afternoon, from a piece of steel tubing. I silver soldered the front piece on and sawed and filed to fit.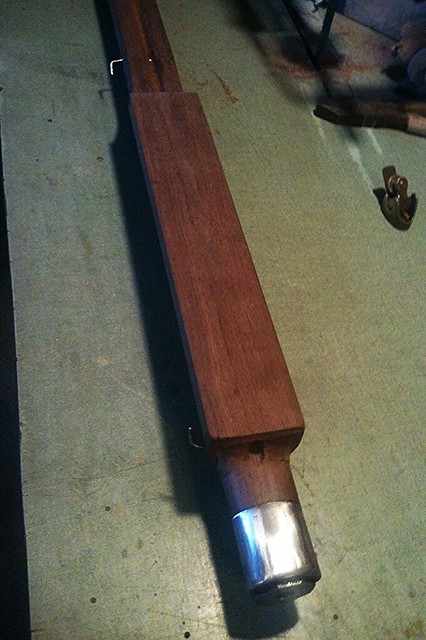 photo (19) by okawbow, on Flickr
![]() Offline
Offline
Took the rifle to the range today and shot off a couple dozen rounds. I got the cheek piece filed to fit me.
The sights were off a good bit, but I need to put the barrel in the vise to move them.
I discovered that the mainspring on the lock is too weak. Too many caps didn't go off the first strike. I'll make a stronger one.
I tried several different patch materials, and found a lighter weight denim that worked well. Used Balistrol and water mix for lube. Cleaned between shots with the same mix. I think my denim was too worn out to make good patching material. I noticed some balls went down easier than others. I'll measure, and buy some new. The patches looked good after firing.
After settling on a patch material, and charge, (120 gr. 2F) I fired a 10 shot group at 55 yards off a chunk. I think most of the vertical spread was due to different patch thickness, and my inability to see the target clearly. It was hard to tell when the front sight blade was even with the bottom of the black square. Maybe a ball sight system and round spotter would work better for me.
There was very little recoil from the 21#, 48 cal. rifle. The group measures 1.55" center to center, and my best guess would be about a 7" string.
I'm happy with the results so far, and feel I can finish the rifle now.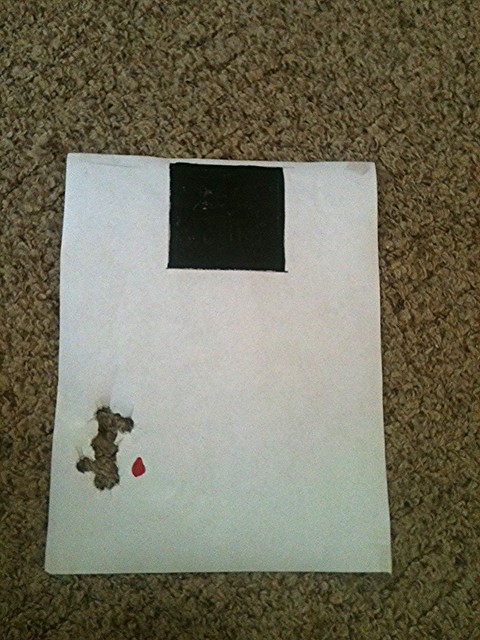 photo (20) by okawbow, on Flickr
![]() Offline
Offline
I've been busy the last few days, and am finishing up the browning and stock finish.
I used the Laurel Mountain Forge browning solution, and it worked very well. I left each of 3 coats on for 12 hours, because it is cold in my workshop. I got the dark brown I wanted without too much scaling. I stopped the rusting with lemon scented household ammonia. I then heated the parts and barrel with a heatgun and coated with boiled linseed oil.
For the stock, I brushed on a sealer I made from bee propolis dissolved in acetone. It works very well and smells great! I then started rubbing in boiled linseed oil. looks good so far.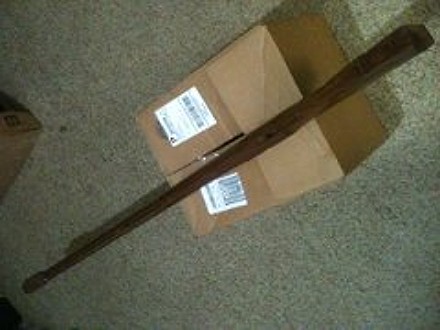 f1 by okawbow, on Flickr
 f2 by okawbow, on Flickr
![]() Offline
Offline
Here are some pictures of the finished rifle. Weight came out at 20#. Some pictures are mirror images. The rifle is right hand.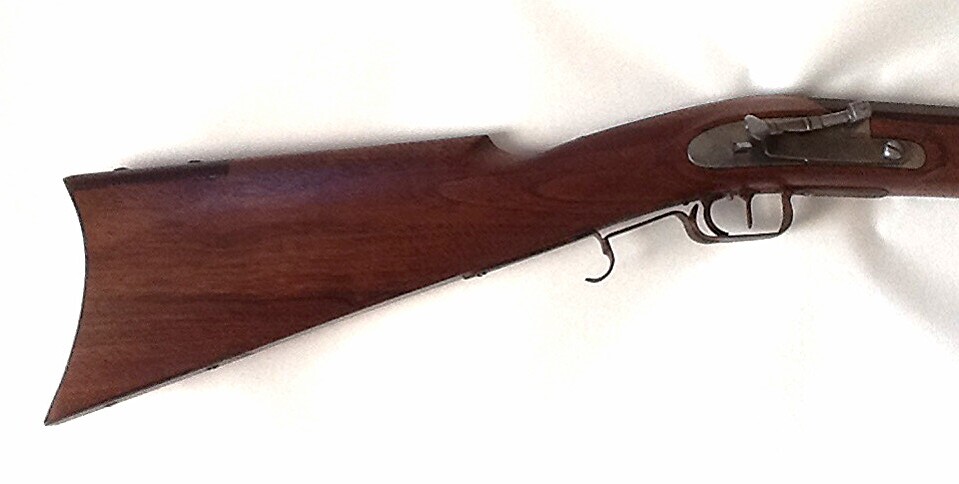 image by okawbow, on Flickr
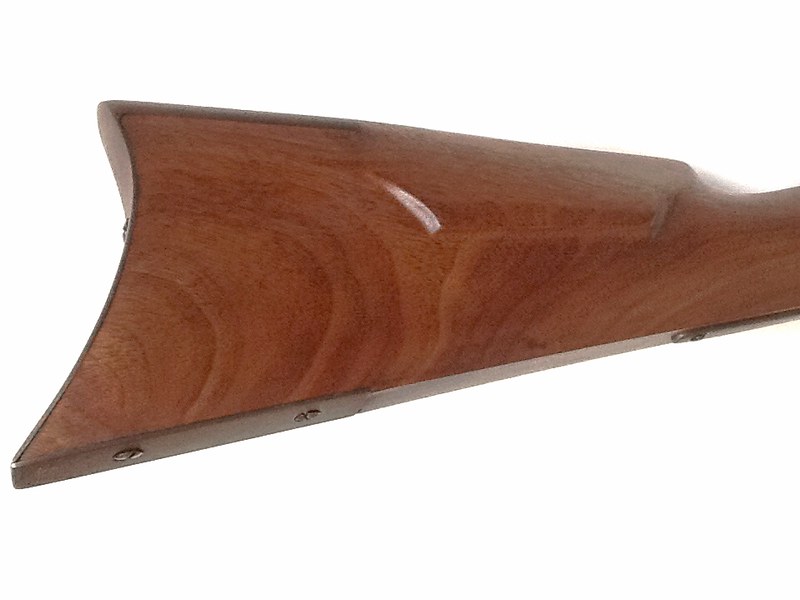 image by okawbow, on Flickr
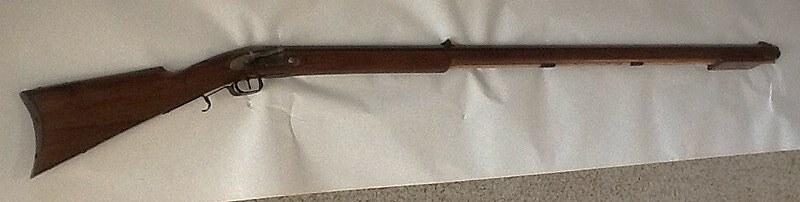 image by okawbow, on Flickr
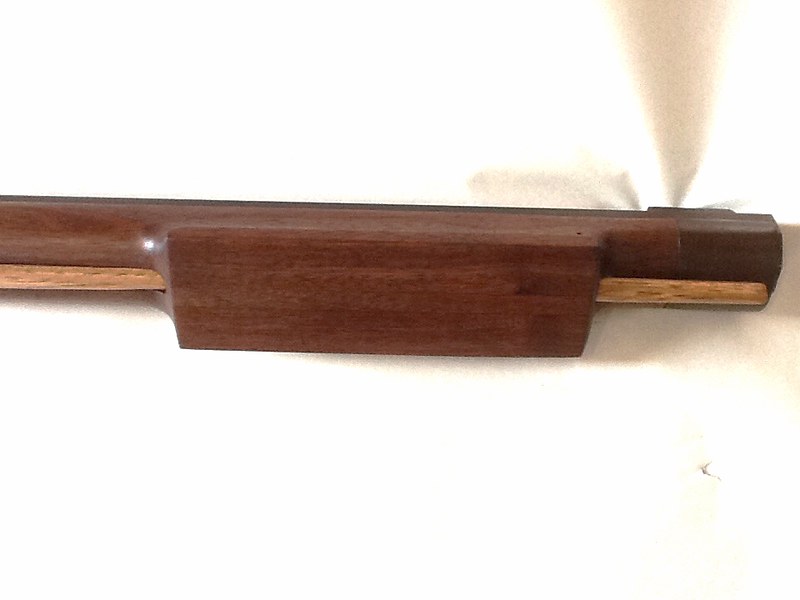 image by okawbow, on Flickr
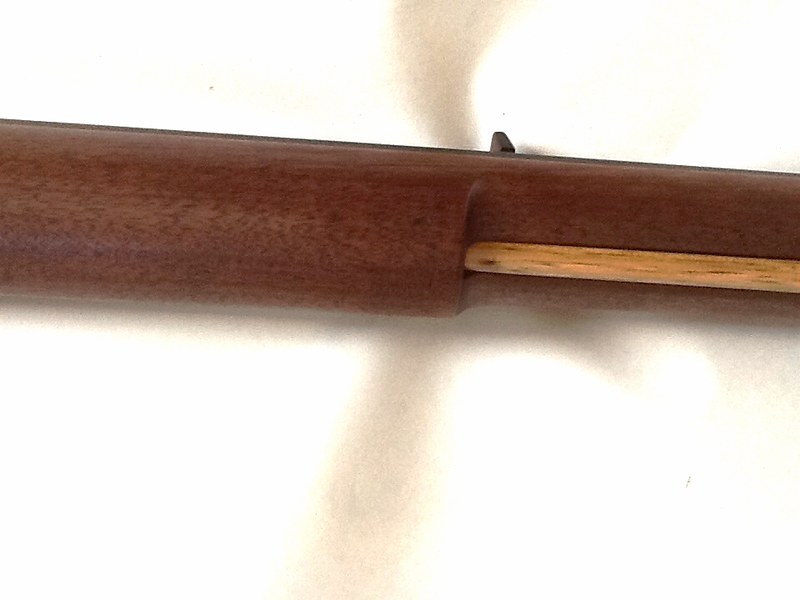 image by okawbow, on Flickr
 image by okawbow, on Flickr
Last edited by Okawbow (1/12/2016 12:53 PM)
![]() Offline
Offline
Oka, did you get your mainspring sorted?
![]() Offline
Offline
I just got a piece of 1095 steel to make a new spring. The old double spring is working well, but I don't think I can trust it.
I'm new at making springs, so I'll make a couple spares.
![]() Offline
Offline
very fine gun dont shoot next to krumme or disboro they love side locks.they would drool on it to much. as for your firing problem make sure the hammer face is hitting the cap square..that is not a uncommon problem .had to fix 2 of my own guns .next don't try and shoot the front sight dead on the black. leave a little white will help on the stringing. the bevel brothers and paul Griffith put a 1 1/2 wide - as long as blacksquare- strip of fluorescent orange under the black they shot when orange could not be seen
hope any of these old fart tips help you out . do love the neat gun you made .keep up the great work
dag
Last edited by dag (2/10/2016 11:37 PM)
![]() Offline
Offline
A little more than a year later, and still refining the rifle. I shot it in the York shoot last month, and did ok, but was not satisfied. I occasionally got a slight hang fire or slow ignition. How could a direct ignition system slow fire?
Shot a good string at the local club's chunk shoot and won! However, I got more hang fires and even a failure to fire near the end. I unscrewed the nipple, and noticed a plug of goo under it. The lightbulb went off in my head! Why hadn't someone told me I needed a nipple that was long enough to prevent crud from building up in the hole?
I ordered a new nipple with 3/8" threads that would just fill the wall thickness of my 1 1/4" , 48 cal. Barrel. I expect perfect ignition every time now, and shorter strings. Watch out next year!
Chuck
![]() Offline
Offline
Very nice build! thanks for shearing. I'm a underhammer guy myself and get alot of questions at the shoots I go to. Sometimes its really fun to show up with something different.
I also build my own muzzleloaders. I have built two. One for my daughter to shoot in 4-H and one for myself for round ball competitions.
Next build is a slug gun in 45 cal .458 Dia.
wish me luck lol.
 1 of 1